圧電スピーカーで音階を奏でる
番外編圧電スピーカーで音階を奏でる。
すぐれたプログラマーになる過程で、いつかはC言語を学習することになります。ここで電子工作と一緒にC言語についても少しだけ触れてみましょう。今回は圧電スピーカを使って音階を奏でることにします。ここでもまずは、wiringPiを使います。
以前はRubyのライブラリーとして使ったwiringPiなのですが、今回はC言語です。本来のオリジナルプログラムはC言語で書かれています。それをRubyでも使えるようにされていたのですね。他の言語で書かれたライブラリーを目的の言語でも使えるように作られたプログラムをラッパーなどといいます。食品を保存するときに使うあのラップですね。既存の言語をターゲットの言語で覆い包んでしまうイメージです。
説明はこれぐらいにして、wiringPiをインストールしましょう。
gitがインストールされてない場合はインストールします。
pi@raspberry sudo apt-get install git-core
gitを使ってwiringPiをインストール。
pi@raspberry git clone git://git.drogon.net/wiringPi
pi@raspberry cd wiringPi
./build
buildと入力することによって、C言語のソースコードをコンパイルします。
今回は、作者のサンプルプログラムをそのまま拝借して動かしてみましょう。
tone.cというファイルを作成します。
pi@raspberry vi tone.c
/*
 * tone.c:
 *	Test of the softTone module in wiringPi
 *	Plays a scale out on pin 3 - connect pizeo disc to pin 3 & 0v
 *
 * Copyright (c) 2012-2013 Gordon Henderson. <projects@drogon.net>
 ***********************************************************************
 * This file is part of wiringPi:
 *	https://projects.drogon.net/raspberry-pi/wiringpi/
 *
 *    wiringPi is free software: you can redistribute it and/or modify
 *    it under the terms of the GNU Lesser General Public License as published by
 *    the Free Software Foundation, either version 3 of the License, or
 *    (at your option) any later version.
 *
 *    wiringPi is distributed in the hope that it will be useful,
 *    but WITHOUT ANY WARRANTY; without even the implied warranty of
 *    MERCHANTABILITY or FITNESS FOR A PARTICULAR PURPOSE.  See the
 *    GNU Lesser General Public License for more details.
 *
 *    You should have received a copy of the GNU Lesser General Public License
 *    along with wiringPi.  If not, see <http://www.gnu.org/licenses/>.
 ***********************************************************************
 */

#include <stdio.h>
#include <errno.h>
#include <string.h>

#include <wiringPi.h>
#include <softTone.h>

#define	PIN	5

int scale [8] = { 262, 294, 330, 349, 392, 440, 494, 525 } ;

int main ()
{
  int i ;

  if (wiringPiSetup () == -1)
  {
    fprintf (stdout, "oops: %s\n", strerror (errno)) ;
    return 1 ;
  }

  softToneCreate (PIN) ;

  for (;;)
  {
    for (i = 0 ; i < 8 ; ++i)
    {
      printf ("%3d\n", i) ;
      softToneWrite (PIN, scale [i]) ;
      delay (500) ;
    }
  }
}
この圧電スピーカーは極性を意識しなくても問題ありません。
そして、今回もコンパイルします。今回はファイルの出力名等々を指定します。
pi@raspberry cc -o myprog tone.c -lwiringPi -lpthread
pi@raspberry ./myprog
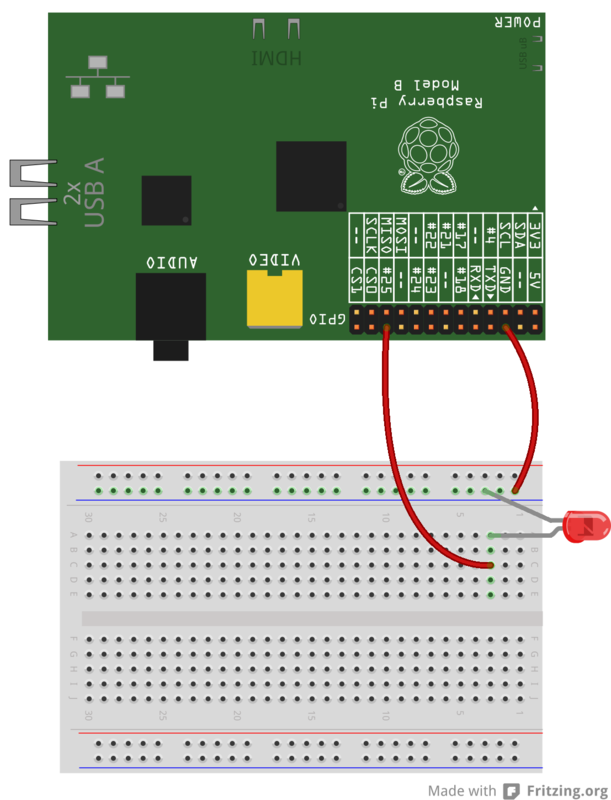
LEDの時と同じ回路を作り音を鳴らすと音階が流れました。

C言語を使った工作として最後にサーボモータを動かしてみましょう。
http://lchikaamazon.hatenablog.com/entry/2014/12/21/153644